Fermenting Solutions Issue 6: The First Rule of Fight Club is...

Published: Sun, 04/03/16

April 4, 2016 View in browser
Image
www.imdb.com
Just about every time I tell someone that I make my own soap, it immediately results in discussing the movie Fight Club.  It's possible that my desire to first make soap can be traced back to Tyler Durden, but I remember being driven more by wanting a moisturizing bar that didn't smell like a perfumery.  I also wasn't interested in starting the whole process using animal fats and the movie had me rightly concerned about the dangers of lye.  Turns out that the most difficult part about using lye is actually finding it... Most places just simply don't carry it anymore and getting it shipped to you in any sort of quantity requires a HazMat license.
www.amazon.com
The Soapmaker's Companion was my first introduction to the art of making soap and although some of the information in the book is dated, I still consider it a good introduction.  Making soap is pretty straight forward... in the most basic case, it's just fats, water and lye mixed together in the right proportions.  From there, you can up your game by adding essential oils, exotic 'fats' and fitting your product into custom molds.  Personally, I avoid any fragrances and occasionally add an exfoliant... spent grains from the brewing process work great for this.

I follow the 'cold process' for making soap.  This means that I mix the lye with water and separately, warm the fats just enough to liquefy them.  When the fats are liquid, the lye mixture is combined which starts the chemical reaction and the entire mixture is stirred vigorously.  You can do this by hand, but I recommend using an appliance to do this.  Eventually, you'll want to look for signs of a trace.  Scoop some of the mixture up in a spoon and slowly drip it across the surface of the mixture and look for it to leave a distinct trail across the surface.  This means it's time to add any additional additives and get it into molds quickly.  Cover the molds with towels to keep them warm and wait for a day or two.  At this point the soap should be hard and you can technically use it, but I recommend curing it.  Take the soap out of the mold and cut it into the bars that you intend to use.  I like to put them on a paper bag in a dry, dark area.  This curing process can go on for up to 6 weeks and every few days, you can turn the bars so that each side is exposed to the air.
Image
en.m.wikipedia.org
The process of making soap is called saponification and it is the act of bonding the fats with the sodium hydroxide (lye) in just the right amounts to render the lye inert.  I tend to create 'super fat' soaps these days and increase the amount of fat in the recipe so that some is left over as an added moisturizing agent after the lye is used up.  This can backfire, so for the first few times making soap, I recommend using a calculator like LyeCalc to get your measurements just right.
Image
bonesdontlie.wordpress.com
Saponification does occur naturally in some circumstances.  While putting together this information, it made me recall seeing the 'Soap Lady' at the Mütter museum in downtown Philadelphia.  If you've never been, this place is loaded with tons of oddities.
Image
photos.google.com
Here's a shared album that shows my soap making tools and process.  There are a few important takeaways:


  • Lye is caustic and a poison and should be treated as such!  Wear nitrile gloves and eye protection and work in a well ventilated area

  • Lye is caustic to things other than human flesh... use stainless steel for anything that comes in contact with it.

  • I use silicone baking trays for my molds, it makes getting the finished soap out much easier without the need for using waxpaper.

Image
www.thingiverse.com
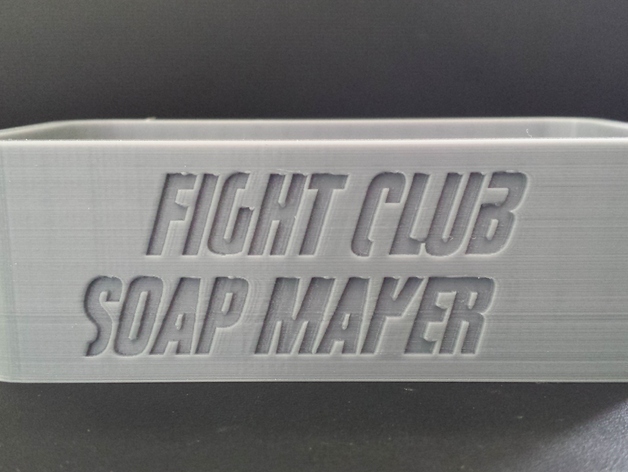
As soon as I find a way to color my soap that insane pink color, I'll need to use one of these to print out some actual Fight Club bars to hand out as gifts.
Image
untappd.com
This week marked the unveiling of The Great White Hype .  I finished this beer by adding a homemade chocolate extract and coffee before kegging it.  I used one cup of ground, locally roasted One Village Coffee cold brewed in 3 cups of water over night.  I made the chocolate extract by soaking 2 oz. of raw cacao nibs in 6 oz. of vodka for 4 days.  I then strained the nibs out and put the container of chocolate extract in the freezer over night.  This caused a fat cap to solidify on top and I skimmed that off before adding it into my keg.

I'm definitely happy with how this turned out, but will definitely make some adjustments next time.  I'll likely reduce the amount of coffee used and definitely do a tertiary fermentation to help with clarity.  I feel that adding some English hops at the end of the boil will also benefit as well.
Until next week! The polar vortex has created a mess of tree destruction for me to clean up... Can't wait to see how this turns into next week's topic.

Questions?? Want a deeper dive on something discussed here? Drop me a line to continue the conversation:
jason@transmutableexplorations.com
@jasondonmoyer
+JasonDonmoyer

View past issues or become a subscriber here
This curated newsletter was made with love for you using Curate, the latest AWeber mobile app for iOS and Android.
AWeber